Today I’m going to talk about outdoor portraits.
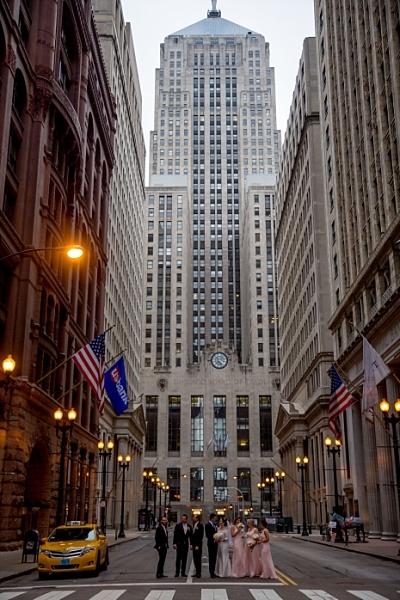
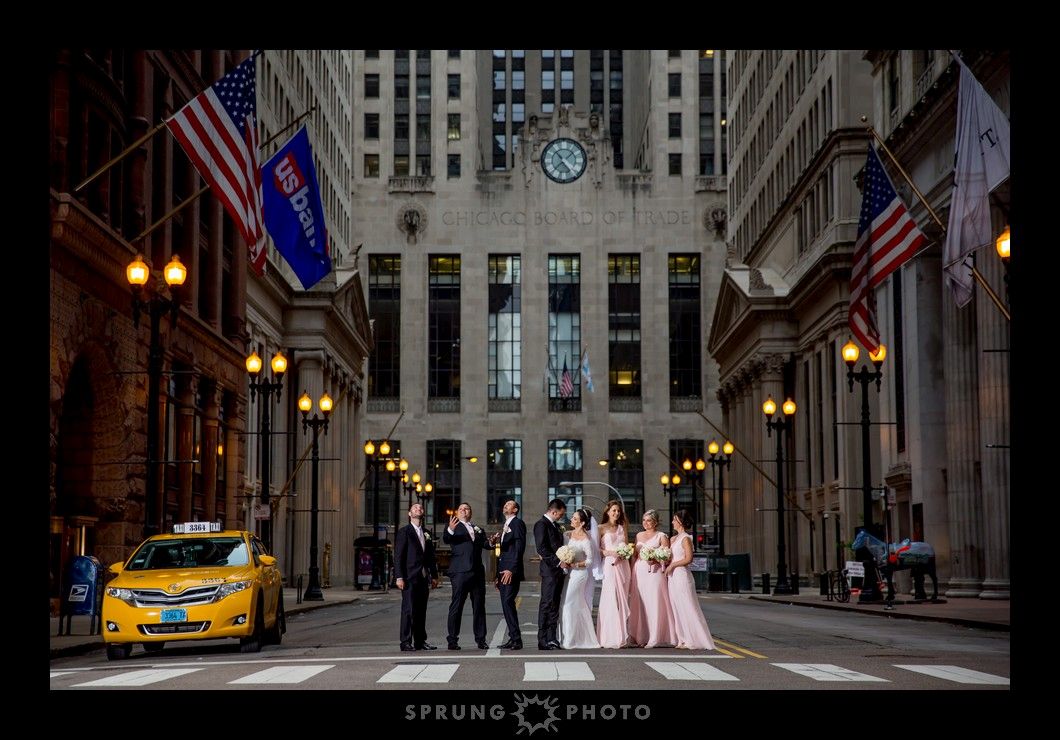
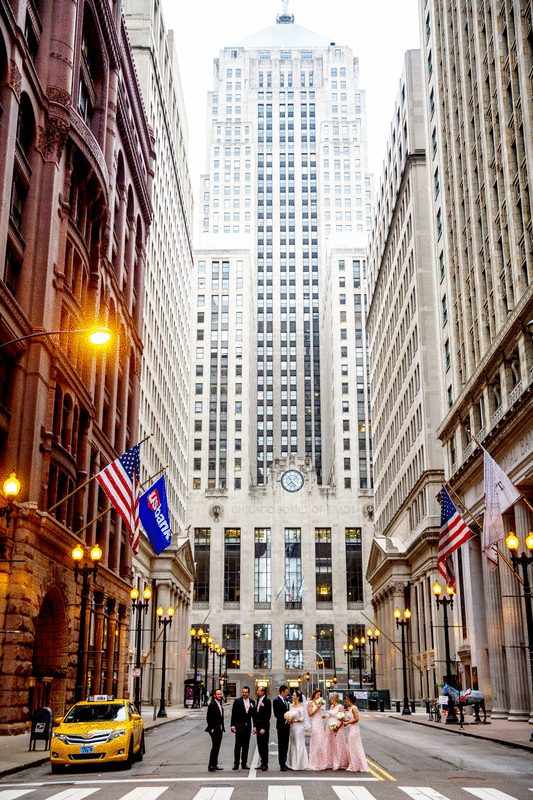
Anyone who photographs in Chicago knows this scene. It’s La Salle and Adams streets, in front of the Board of Trade building. It can be tough to balance the abundance of light on the Board of Trade building with the “open shade” (the sky is visible above, but the subjects are in the shade) situation going on beneath it most of the time. To add to the difficulty, you’re usually there at the time of day when the sun is shining on the top of the building the brightest! So when you try to use just natural/ambient light, what you usually end up with is over exposed buildings, in order to get your subjects exposed properly. Here is an example:

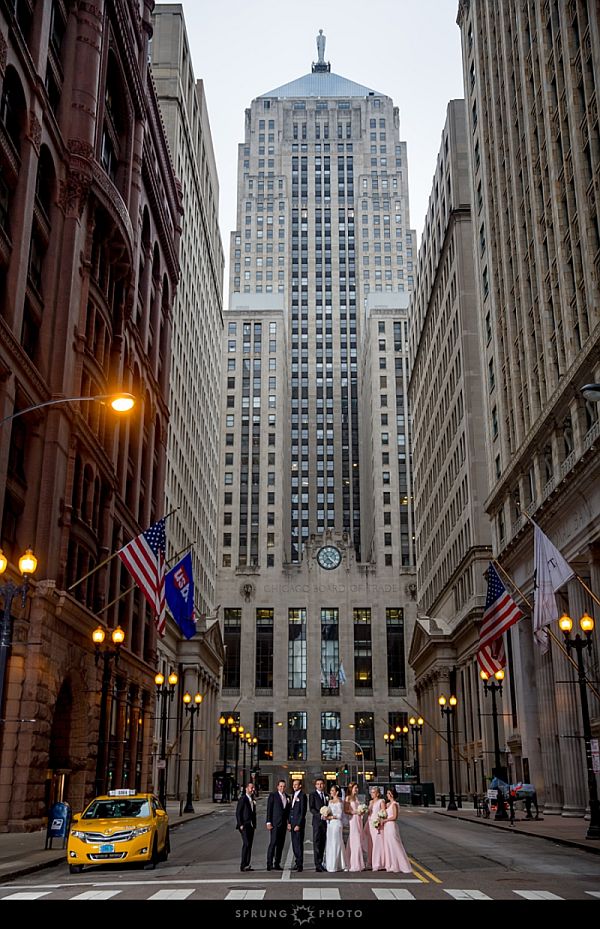
So when you try to expose for the bright part of the building and the sky, your subjects end up getting under exposed, as seen here:
So what do you do in this situation? Just accept the fact that the buildings are going to be over exposed? Try and “fix” it later in post? I have a better solution for you: Add light!
The best way to do this is with an assistant or someone to hold your light. However, in another installment of this blog series, I will give you a few tips on what to do if you DON’T have an assistant, or a powerful light such as the Profoto B1. Stay tuned!
If you want to take unique, well balanced portraits outdoors, adding light to your scene is something you’ll want to add to your repertoire. Let’s talk about some things you can do to make this photo better!
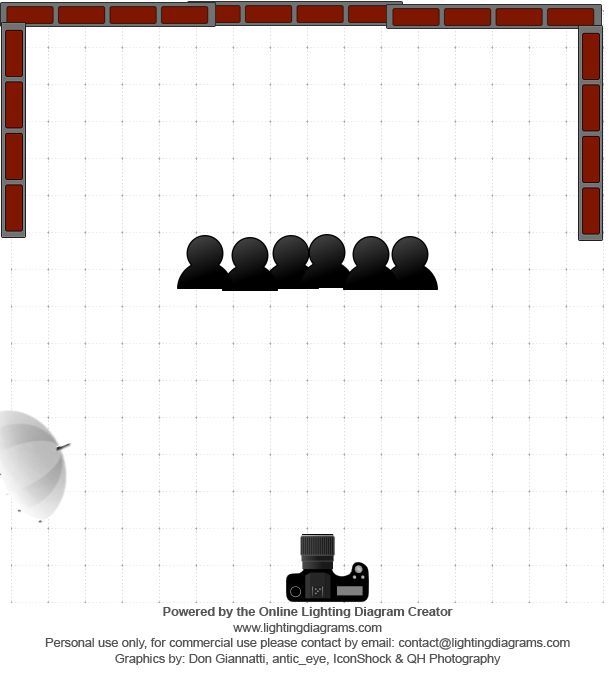
Here is a pull-back shot of my set up for this image. My assistant is to camera left, holding the Profoto B1 flash on a light stand, with a 41” translucent Profoto umbrella attached. I love the B1 because of how powerful it is, and how easy it is to transport with its built-in battery. Because it is so powerful (500Ws), I can have it further back, and I can use a modifier on it such as an umbrella.
Steps:
- Decide on your composition, and don’t forget to figure out what you want your subjects to be doing in the photo! More on this in another installment.
- Expose for your background first. Take some photos with the flash off, getting your exposure for the background the way you want it. How dark do you want the buildings and sky to be? Maybe you just want to expose them so that they are more even with your subjects. Maybe you want the buildings much darker so that your subjects really stand out from the background. This is up to you and your style!
- My settings for this image: shutter: 1/200th, f/2.8, ISO 100, 24-70mm f/2.8 II Canon lens at 39mm, Profoto B1 flash at full power.
- Automatically starting at ISO 100, as well as the flash sync speed of 1/200thof a second creates a darker background right away. For outdoor portraits that are not in direct sunlight, I usually start with these settings, as I can picture what it will look like in my head right off the bat: ISO 100, f/2.8, shutter 1/200th. It’s helpful to come up with your own base settings, so that you always know where to start!
- Once you have your background exposure set, determine where your subjects are going to be, and how they will be effected by the light you’re adding. For this shot, they are all lined up side by side and at the same level, so that they will all be in focus, and so that peoples’ bodies won’t cast shadows on others. I also placed my light far enough away so that the light would spread more evenly across all the subjects. Adjust your light’s power until you are satisfied with the effect and exposure. For this image, the B1 was at full power. The more flash power you add, the darker you can expose your background. Add less flash power to balance your subjects more with a lighter background. They are two very different looks, so determine what you like best!
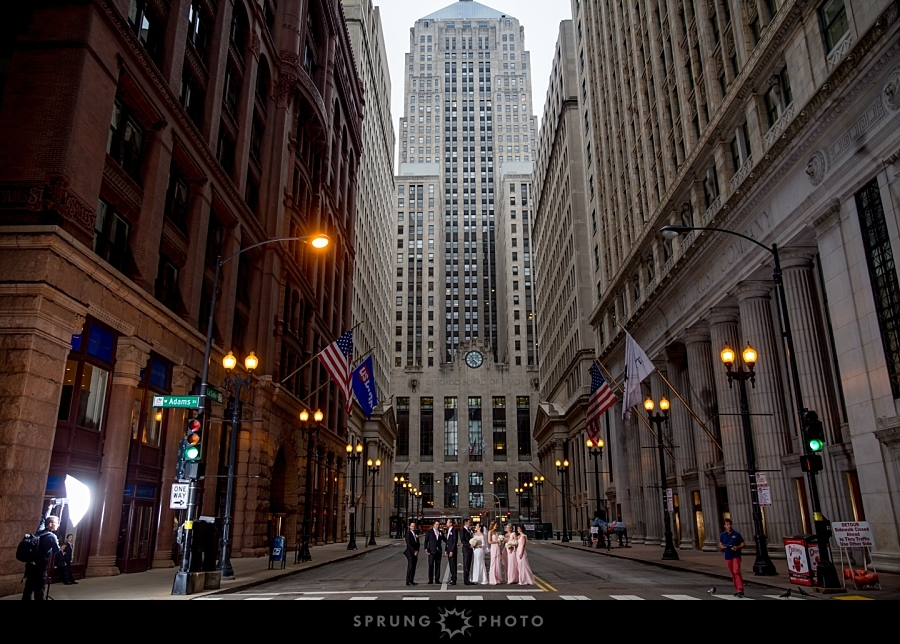
Here is the result. For this shot, it’s a little more balanced between the subjects and the background. By adding light, you can have the buildings and sky exposed properly, and your subjects as well. Your subjects also stand out more, because the top of the building is no longer the brightest part of the image.
With the following shot, the composition was changed so that only the darker part of the building was visible, creating more dramatic lighting and popping the subjects off the background even more. The only setting that changed for this image was the focal length (70mm).
Before and After:
Don’t settle for the quick, easy, “snapshots”. Go a little further, incorporate additional lighting, impress your clients and yourself, and make your images sing!
Equipment list:
Canon 5D Mark 3
Canon 24-70mm f/2.8 II lens
Profoto B1
Profoto B1 Air Remote for Canon
Profoto B1 Air Remote for Nikon
Profoto 42” umbrella translucent
Website Links for more info on the items used: